This tutorial was imagined to solve a precise problem : someone is stuck with an old smartphone on which he cannot add music, but can still browse the web. How can this person listen to his incredibly huge collection of music files ?
Table of contents
- Intro.
- Installing & running Apache.
- Configure local access only.
- Point to directory and make it all browseable.
- Optional : customization.
- More customization : CSS
- More and more customization : header and footer.
- Conclusion, development.
- Sources
So what we thought was : let’s create a website available only on the local network that would give read access to all the files inside a folder.
To do this we’ll use the Apache HTTP server which is free and open source software.
The pros and cons of this method are :
Pros
- Lightweight
- Fast and reliable
- Can be accessed by any device with a web browser
- Possibility for future expansion are endless.
Cons
- We’ll use an Apache Index which is a little “bare bones”
- Only view one media at once (no playlist or repeat mode)
- No search function

Even my Nokia 8110 could browse the files !
Installing & running Apache.
To install Apache, open a terminal (Ctrl+Alt+T) and type in :
sudo apt updatesudo apt install apache2
That’s all. Apache commands are :
service apache2 start
service apache2 stop
service apache2 reload
Respectively to start, stop, or reload the server (in case of updates). Note that you need root access and will most likely be asked your password.
When you type in your IP address in a web browser, the Apache default page should display :
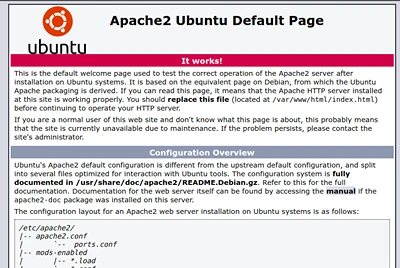
Credit : ubuntu.com
To know your IP adress, you can either go to your connection settings details, or in a terminal :
hostname -I
Configuring local access only.
Now since we want to access the files only from the local network, we should restrict who can access the server to only IP addresses of the local network (as well as the localhost). This is especially important if you plan to have sensitive files on the network, or if you will host your multimedia files (otherwise be ready for copyright infringement actions).
We will keep the default configuration file, as for now, we are just planning to browse files on a drive. Find the 000-default.conf file in /etc/apache2/sites-enabled/ folder (need to be root).
Or like a boss use the terminal :
sudo nano /etc/apache2/sites-enabled/000-default.conf
For now, under DocumentRoot let’s add the following lines :
<Directory> Require host localhost Require ip 127.0.0.1 Require ip 192.168 Require ip 10</Directory>
This will allow connections only from : localhost (the machine hosting the server, also called : 127.0.0.1.) and to machines in the local network as they use IPs with the 10 or 192.168 prefixes.
Save and exit.
Point to directory and make it all browseable.
Still in the 000-default.conf file, change the
DocumentRoot /var/www/html
line to the folder or drive you want to use. Example :
DocumentRoot /media/gori/ExternalDriveName
Also, add the location of the folder in the Directory section, e.g. :
<Directory /media/gori/ExternalDriveName> Require host localhost Require ip 127.0.0.1 Require ip 192.168 Require ip 10</Directory>
For Apache to show an index of your folder, the option must be added to the same .conf file, so again :
<Directory /media/gori/ExternalDriveName> Options Indexes Require host localhost Require ip 127.0.0.1 Require ip 192.168 Require ip 10</Directory>
User permissions.
When browsing an Apache server, the user is considered part of the www-data user group, in order to access the files, we will grant ownership of the folder to the www-data user group with the command :
sudo chown -R www-data:www-data /media/gori/ExternalDriveName
chown grants ownership (CHange OWNer)
-R means recursively, subfolders ownership will also be modified
www-data:www-data specifies the user and the group to be given ownership to,
And last is the folder to be modified.
And now, after reloading the apache2 service, any device connected to the local network should be able to see the folder you specified !
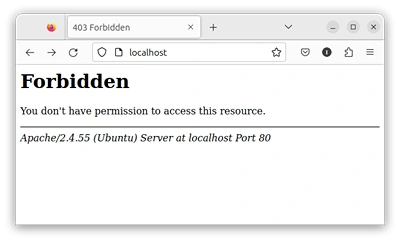
Without permission
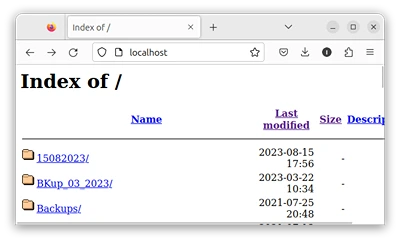
With permission
Optional : customization.
As you can see, while functional, the Index looks quite sad, so let’s add a few options, again in the 000-default.conf file. Under the DocumentRoot line we will add :
DocumentRoot /media/gori/ExternalDriveNameIndexOptions FancyIndexing FoldersFirst IconsAreLinks NameWidth=* HTMLTable
IndexOptions adds various options to the Index.
FancyIndexing… “This turns on fancy indexing of directories.” according to the Apache documentation ! Now in effect it does add some icons and better sorting capabilities but I struggled to find an exact description.
FoldersFirst will lists folders before files, use if needed.
IconAreLinks allows you to click on icons ![]() to access files.
to access files.
NameWidth=* automatically resizes the table’s width to display the full filename. Different options are available, see here in the NameWidth paragraph.
HMTLTable generates an HTML Table, again it was a little bit tedious to find a description, but it does look better.
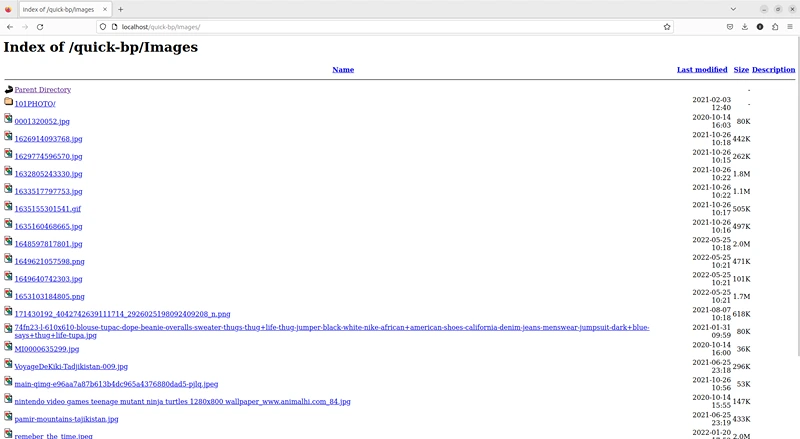
Now it’s already more usable, the table displays the full names of files and extends accordingly.
More customization : CSS.
Since this server is your own space of freedom and expression (yeah…) why not add more fancy touches ?
To do this, we will first create a folder named css in our DocumentRoot folder, e.g. :
/media/gori/ExternalDriveName/css/
Then in this folder, we will create a file called theme.css (you can choose whatever name you want as long as it ends in .css It stands for Cascading Style Sheet and will contain codelines that generates the style of our Index.) For now let’s leave it empty.
Next, in the 000-default.conf we will add the IndexStyleSheet line under the IndexOptions line
DocumentRoot /media/gori/ExternalDriveNameIndexOptions FancyIndexing FoldersFirst IconsAreLinks NameWidth=* HTMLTableIndexStyleSheet "/css/theme.css"
Which means that the Index will be styled by the content of theme.css !
Let’s add some lines to make this boring index much cozier :
To modifiy the body of the table, we will be modifying the body element, in theme.css let’s write :
body {width: 100%; text-transform: full-width; font-family: system-ui; color: lime}
width: 100% is the width of the body element, so here 100% of the page.
text-transform: full-width purely decorative, looks like Vaporwave aesthetics.
font-family: system-ui changes the font family to match your computer’s system font, most common fonts are supported.
color: lime your text will have a beautiful lime color ! (Like in Matrix if you’re a Keanu Reeves fan)
To change the text, which consists mostly of links, we need to change the a element (links)
body {width: 100%; text-transform: full-width; font-family: system-ui; color: lime}a {color: lime}a:hover {color: white}
a {color: lime;} links will have this beautiful lime color.
a:hover {color: white;} when we hover over a link, it will turn white.
Let’s choose a nice picture full of good taste for the background. For commodity, we will place it in the same folder as our .css file, then add to theme.css :
body {width: 100%; text-transform: full-width; font-family: system-ui; color: lime; background-image: url("/css/background.jpg"); background-size: cover}a {color: lime}a:hover {color: white}
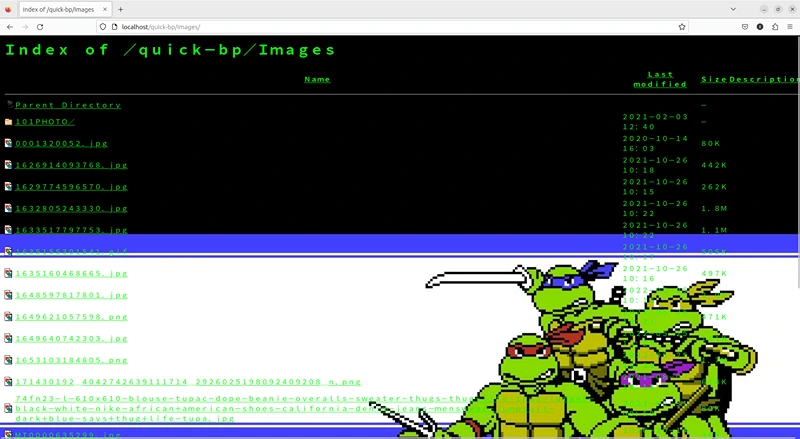
Good taste.
background-image: url(“/css/background.jpg”) specifies the image to be used as background
background-size: cover adjusts the image to cover the whole page, without tiling, more possibilities can be found here.
More and more customization : header and footer.
Now… we can also add fancy but also useful touches to our index. Example : a top menu with our most useful links, a custom footer. All of this is built in Apache, we just have to add some files.
First, in our DocumentRoot directory, (/media/gori/ExternalDriveName in this case) let’s create two files called : header.html and footer.html.
In our header.html, let’s add a title and some links :
<!DOCTYPE html><html><head><link rel="stylesheet" href="/styles.css"></head><body><h1> Welcome to Gori's Index </h1><a href=/>Main page.</a><a href=/Music>Music.</a><a href=/images>Images.</a><a href=/Blog>Blog.</a></body></html>
<h1> Welcome to Gori’s Index </h1> is our title.
<a href=/Music>Music</a> is a link, in this case to the music folder.
<link rel=”stylesheet” href=”styles.css”> “links” the header.html to our previously created theme.css style sheet.
In our footer.html, let’s add a title again, and a link to the top of the page.
<!DOCTYPE html><html><head><link rel="stylesheet" href="/styles.css"></head><body><h1> Gori's index, 2023.</h1><a href="#top"/>Page top.</a></body></html>
Notice here that our <a href= is followed by a # this is to indicate a section of a page, let’s create a section called top in the previous header.html and locate it a the top of the page.
<!DOCTYPE html><html><head><link rel="stylesheet" href="/styles.css"></head><body><div class="top" id="top"><h1> Welcome to Gori's Index </h1></div><a href=/index.html>Main page.</a><a href=/index.html>Music.</a><a href=/index.html>Movies.</a></body></html>
<div class=”top” id=”top”> … </div> sets the enclosed content as a “division” or section, here we called it top, and can link to it with #top.
Now reload the apache2 service, and once you refresh the page you should see the changes :
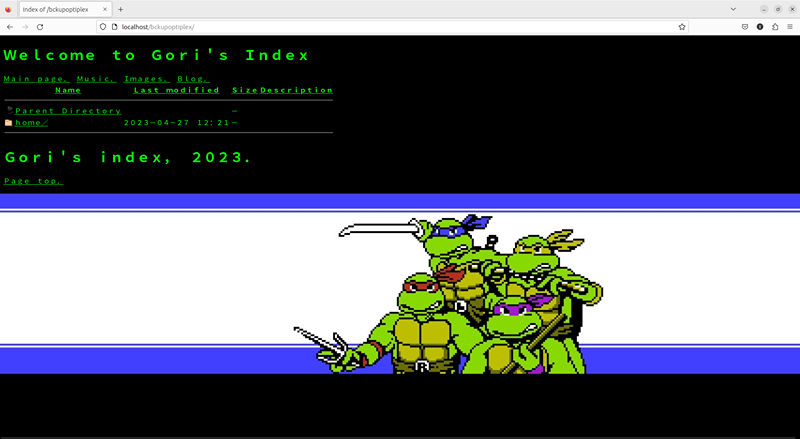
The end result.
Conclusion, development.
So now, we have set up and customized a local server that allows us to access most of our multimedia content, with a simple web browser. Possibilities for future development are bordering on infinity, as it is always possible to add content, html pages, add PHP support, JavaScript, and so on… Basically, one could set up his own intranet, or even go live from here, provided he has sufficient rights on the content and hardware capabilities.
For us, let us now sit back and enjoy listening to the greatest hits of Kool and the Gang from a Nokia 8110, a hidden pleasure of life.
Staff roll, Pokémon Gold & Silver, watch on YouTube
Sources
This tutorial is the result of lots of search and reading, here are its sources :
https://developer.mozilla.org/en-US/docs/Web/CSS
https://www.w3schools.com/
Both excellent sites to learn about CSS and HTML, extensive documentation.
https://webmasters.stackexchange.com/questions/59624/allowing-access-to-an-apache-virtual-host-from-the-local-network-only
Very useful advice found on the exchange board.
https://perishablepress.com/better-default-directory-views-with-htaccess/
Excellent tutorial about styling the Index ! Lots of details.
https://ubuntu.com/tutorials/install-and-configure-apache
Installing Apache on Ubuntu.
https://httpd.apache.org/docs/2.4/
Last but not least, the official Apache website, with complete documentation about the server.
https://r4.wallpaperflare.com/wallpaper/203/203/765/video-games-teenage-mutant-ninja-turtles-comic-art-comics-wallpaper-442f0ede1a9ea0a04d4c31122195e63f.jpg
This TMNT wallpaper.

